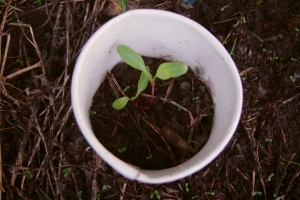
Gardening is a wonderful activity. Aah the smell of earth and mulch, the feel of soil under the finger nails… I’ve been working quite a bit on my garden recently. One thing that I’ve found quite frustrating is planting seeds and then marking where they have been planted, so that they don’t get lost when mulched and watered. Argh! So I came up with a very simple and environmentally friendly solution – re-using cardboard coffee cups, paper towel and toilet paper rolls, and milk cartons. Enjoy!
Materials:
– used cardboard cups, rolls, cartons
– knife or scissors
– garden patch, plant pot or styrofoam box with soil or manure
– seeds
Step 1:
Cut the bottoms off the cardboard cups or cardboard milk cartons. Cut the paper towel rolls into 3 or 4 sections, and toilet paper rolls can be left as is or cut in half.
Step 2:
Prepare your planting area – I am reusing a styrofoam box, filling it with horse manure, approximately 2/3 of the way up.
Place your open-ended cups or rolls upright in the box, pot or patch. Make sure you allow for some room between plants, as they don’t like to be crowded!
Step 3:
Top up with some more soil or manure, so the cups or rolls become well buried but are still visible. Make sure they are sitting firmly in the soil or manure.
Step 4:
Grab your seeds and pop them into the soil. Today, I’m planting red capsicum.
Step 5:
Cover them with a bit more soil and water them in.
Now when you mulch, you will have a clearly visible area, where your seedlings will grow. Not only that, but by using cardboard, you can rest assured that the roots of the plants won’t have a hard time breaking through the degradable material.
Here are some silverbeet and red chard seedlings. I planted the seeds using the same method a few weeks earlier. I used cardboard coffee cups, toilet paper rolls and cardboard milk cartons.


